Showing posts with label recipe. Show all posts

Friday, October 17, 2025

when you least expect it

A post about food.

Since discovering Extra Extra Coarse Bulgur a few years ago, it's been a staple in my pantry. I stopped cooking with rice; I find the bulgur has more flavor and texture, and holds up better to the freezing and reheating that are standard procedure here.


The tricky part: this particular bulgur - Duru Extra Extra Coarse - has only been available to me from the shop where I buy Turkish coffee, and I rarely have access to that shop because it is 45 minutes away. So when I do get there, I stock up on both coffee and bulgur.

Well, the last two times I borrowed a car and made the trek, there was no stocking up. The first time there was neither Extra Extra Coarse Bulgur nor Mehmet Effendi coffee on the shelves, and in fact the entire shop looked alarmingly thin in stock. The second time, months later, the shop was "Closed for Renovations." Uh-oh. I began rationing my last bag of bulgur. That's it, in the picture above.

Of course there was still plenty of neglected rice maturing in my cupboard, and a couple of months ago, by a happy chance, I saw a one-minute video about adding more food value to a bowl of white rice. The method also adds more texture and flavor, making this rice mixture a good substitute for the bulgur which had earlier become my substitute for rice. And because the person in the video was using a rice cooker, I tried using the Rice setting on my Gourmia pressure cooker. It worked beautifully. I think a regular pot would work just as well, though the timing might require testing.

Here is the mixture:

1 cup rice, 1/2 cup quinoa, 1/2 cup lentils, 3 cups water.

I've been using red lentils, and all sorts of combinations from half-empty bags of jasmine rice and arborio rice and plain old white rice. The result has more flavor and texture than plain rice, and if freezes and reheats well. Bonus: I finally have a genuinely interesting way to use that bag of quinoa that's been on the shelf for, well, quite a while.

Also it looks rather festive, especially made with tri-color quinoa:


Extra Extra Coarse bulgur would still be my first choice but until

Oh my gosh. Weirdly coincidental newsflash: my Occasional Helper just emailed a news clipping. No details, unfortunately, but the shop where I bought bulgur and coffee from Turkey now has a "for rent" sign on the building. Big sigh. It was a family-owned  business for 20 years. I can only hope the owners and employees are all landing on their respective feet.


I may be making and eating this rice mixture for a while.

Glad I found it.

Let me know if you try it.


~~~~~


Thursday, October 10, 2019

yesterday


Yesterday the weather forecast was 5 days of rain beginning at 7 AM. This was not great news, but it did get me up and out early to do as much as possible. I carried extra hay to all the covered feeders, filled water buckets, gave the hens a tomato and half an apple, and coaxed LeShodu to eat some apple slices - she was a bit quiet and didn't want to eat anything, even oats which I had to sneak past the other goats. Then I closed some of the barn doors to keep a bit of the rain out. The barnyard is already so muddy I've put 2x6 "bridges" out for the goats, and I have to wear rubber boots to get to the barn.

At 7 the sky was grey and rain seemed imminent, so instead of taking Piper for a walk - we got caught in heavy rain a half-mile from home a few days ago - she joined me to work in the vegetable garden. It was still too wet from Monday's rain to harvest the catnip, but I did gather a few zinnias, picking ones whose long stems seemed most likely to get pelted to the ground.


I also picked an armful of bean leaves, still green but already beginning to fall from the vines. I brought them to the barn for the goats to munch - LeShodu said "no, thank you" - and at that point, the sky looked light blue! I opened up the barn doors that I had closed earlier.

Then I drove down the driveway to the garden, so I could bring up all the vegetables in one trip. By the time I started carrying the vegetables into the house, the sky was  grey again. And in just a few minutes, the rain began and went on for the rest of the day.

So by trying to beat the rain, I got a few hours of focused outdoor task time yesterday, which was fantastic. I couldn't tackle any of the big jobs I had planned for this week - for example, rebuilding paddock gates and working on the new raised bed - but at least I got late vegetables harvested before rain could rot them!

And when the rain came...I baked.

Big News: both the young hens have begun laying! Let the baking commence.

This recipe for "Impossible Pumpkin Pie" is similar to the very popular coconut version. Instead of canned pumpkin, I used the last package of frozen Candy Roaster Squash puree from last year's garden. Since I used a 10-inch pie dish instead of the 9-inch called for in the recipe, I also used 6 little pullet eggs to add volume. My estimate was a little off, though, because it made a bit more filling than would fit in my pie dish. No worries! The extra went into a little Pyrex dish and baked separately. Oh, the house smelled SO good as soon as the baking began!


I would call this more of a baked pudding than a pie, but it does set up solidly enough to cut into wedges and has a well-balanced, not-too-sweet "pumpkin pie" flavor. If I make this again I will make more of the single-serving size - very handy for snacking or sharing.

Happy to say it is not raining this morning, though the forecast still calls for rain today through Saturday. Time to get cracking and see if I can manage another productive day. I hope your Thursday will be wonderful!

~~~~~

Sunday, February 14, 2016

brisk

Crikey, it was cold yesterday. I did evening chores at 4PM to get the goats fed and settled before the sun went down, as it was already below zero. The funny thing is, when I later checked the goat cam, most of the goats were taking turns chasing each other around the South Paddock. Around and around and around. It went on until after dark.

Perhaps this is why those of us who remember spending our childhoods mostly outdoors all year round don't recall being troubled by cold. Maybe we were just running around constantly? If any of you decide to experiment with this, please report back. I'll be over here, wrapped in a blanket and eating cornmeal pudding.


I baked this yesterday, timed so there'd be something coming out of the oven when I came in from chores. It was a treat. Have you ever made this? There are a lot of recipes out there, and most are very similar. I'm happy with my version, so I'll share it in case anyone would like to try it. You know, after you come in from running around and around for a couple of hours.

Please note: even though it's baked in a skillet, this is not cornbread. This one is a sweet treat that belongs in the "dessert for a group" file as it's best eaten warm from the oven. I rarely make it just for myself, though leftovers can be warmed in a microwave and it's still fairly good.
But right from the oven?
My, my.
Luscious.


Ingredients:
2 tablespoons butter
2 cups milk, soured by adding 1 tablespoon vinegar
2 or 3 eggs
1 cup all-purpose flour
3/4 cup white self-rising cornmeal
3/4 cup (or less) brown sugar
1/2 teaspoon baking soda
1/2 teaspoon salt
1 cup cream

Preheat oven to 325F for deep Pyrex skillet, 350F for metal.
Heat your skillet in the preheating oven, adding the butter a few minutes before the batter is ready. You want the butter heated but not scorched.

Mix dry ingredients together in a big bowl.
Whisk eggs in a separate bowl, then add the sour milk to the eggs and blend thoroughly. Whisk milk mixture into dry ingredients, making a very thin batter.

When butter is melted, carefully remove skillet from oven (seems obvious, but I always have to remind myself that the handle is HOT) and rotate slowly to cover bottom and lower sides of skillet with butter. Then set skillet down on stovetop or extended oven rack, and gently pour the batter into center of skillet. The melted butter will rise up and engulf the edges of the batter pool. (Don't worry.) Then, pour all the cream into the center. (Trust me.)

Slide this unlikely-looking concoction into oven slowly to prevent sloshing, and bake for 45 minutes or til top is lightly browned.

Serve warm; the center will be a soft, smooth pudding and the bottom and edges will be lightly crisp from the butter. Lovely contrasting textures. Adding a little drizzle of maple syrup is nice, but it would be easy to overdo; this is a sweet, rich dessert.

Let me know if you try it!

Oh, and here's the temperature this morning:

That's -27C.

It's nearly 8AM but I expect the goats will be staying tucked in for a good long while yet. I wonder if they'll start their day with another game of tag?

Have a perfect Sunday, everyone!
~~~~~

Wednesday, December 2, 2015

cranberry apple mosaic cake

Rhode Island Greening

This is a rare post for Comptonia: a recipe.

Do you already have a favorite recipe for a simple cake with cranberries? If so, I'd love to hear it - put a link in the comments, please! If not, maybe you'd like to try this one. I don't think it belongs to anyone in particular, and I'm not sure how much tinkering I've done with it by now. Some, for sure.

But I've now made this cake three times in two weeks, the exact same way each time. Including once at 4AM, when I was tired of trying to sleep. A cake that I can put together after a sleepless night is a pretty good recipe to jot down, I think.


Ingredients:
1/2 cup (1/4 pound) butter, softened
1 cup brown sugar
3 eggs (or two huge eggs)
1 cup all-purpose flour
1 tsp baking powder
1 tsp cinnamon
1 tsp vanilla
8 oz (2 cups) whole cranberries
½ large or 1 small apple
optional: 2-3 TBS white sugar plus 1/2 tsp
~~~

butter and flour bottom and sides of 9” springform pan
(or use parchment paper)

preheat oven to 350F

cream together:

1/2 c butter
1 c brown sugar

Blending after each addition, add:

3 eggs (or two huge eggs)

add:
1 cup all-purpose flour
1 tsp baking powder
1 tsp cinnamon
1 tsp vanilla

add:
2 c (8 oz.) whole cranberries
optional: 2 or 3 TBS white sugar, if the cranberry:batter ratio is worrying.


The batter will be very stiff. Coax gently into pan.

Thinly slice and peel apple. (Genuine food prep tip: I always slice apples first, then peel each slice with a single pass of the knife. Quick, efficient, easy.)

Break apple slices into pieces and lightly press into top for mosaic.

Bake at 350F for 55 minutes. During first 10 minutes, go outside and distribute apple peelings and core to goats. Be rigorously fair, even though some will believe their neighbor got more.

Remove pan from oven, place on cooling rack. Sprinkle ½ tsp white sugar on top (optional), remove side of pan. Cool at least somewhat before slicing.


If you try this cake, please let me know how you like it!
~~~~~

Saturday, January 18, 2014

because it was there

Very strange to be bake something without an apple in it, I know. But here goes.

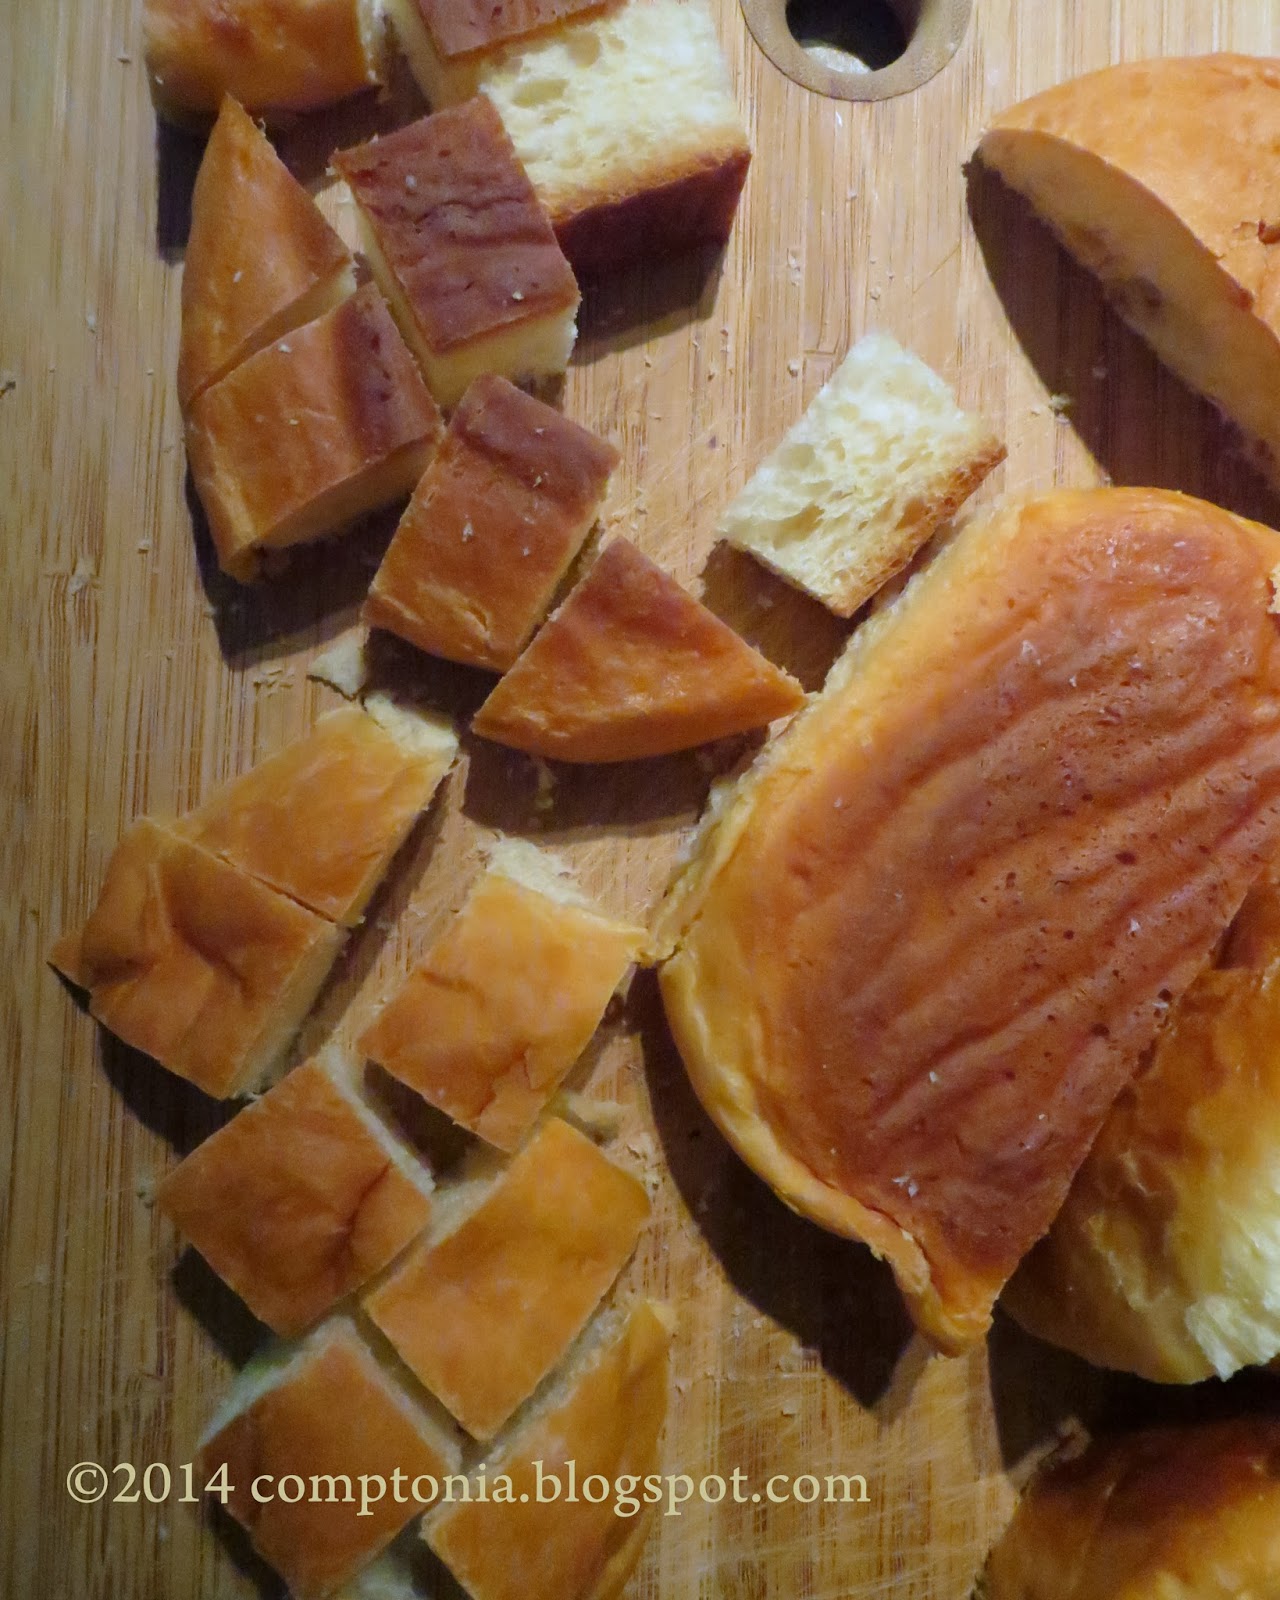
I hadn't planned to bake anything this morning, until I discovered several leftover Portuguese sweet rolls in my cupboard.
They were just slightly too dry to be used for sandwiches, and would probably make terribly sweet breadcrumbs.

So...a venture into bread pudding.


 Cut into little blocks...


...and placed in a buttered baking dish.


Not too tightly, but filling the dish.

Then doused in a mixture of 4 eggs, 2 c milk, 1.5 c sugar, 2 TBS vanilla extract, and 1 TBS cinnamon.
(The recipes I found called for 2 c sugar, but I just couldn't do it.)


Baked at 325F for an hour.
(Because I use Pyrex. In a metal pan: 350F.)

Here's what the pan looked like as I removed it from the oven...
Action shot! 
Drama!! 
Feel the heat!!!


I had a little taste while it was still hot.
And because I didn't make a sauce,
I added a little sliver of ice cream.


Not bad. Especially considering the absence of apples.

I've never made a bread pudding before and can only recall one cold, bland, raisin-studded serving, eaten in a cafeteria somewhere, sometime. 
(Now that I'm thinking about this, there may be a connection between the second part of that sentence and the first.)

This bread pudding tastes rather like French Toast, as one would expect from the ingredients. But the texture is different, with each individual chunk of bread saturated and baked through, and all the chunks forming one cohesive dish.

It would be nice for serving a group for breakfast: simple and quick to put together and pop in the oven, and - unlike French Toast - no one standing, plate in hand, waiting for the next slice to come out of the skillet.

What's your favorite way to use leftover bread?
And if you make bread pudding, what do you like for a sauce?
~~~~~

Tuesday, August 20, 2013

gifts from the tropics

I have a new favorite recipe!

It's an easy-peasy gem from one of my favorite food websites: Mennonite Girls Can Cook.


If you like coconut, I strongly recommend clicking the above link and giving this crustless coconut custard pie a whirl.


I wish I had taken better pictures, but it's too late now as the pie has been eaten. Maybe I'd better make another one?

Flashback! Years ago I did field work in the Caribbean National Forest. I remember driving up and down narrow, winding, mountain roads, and at one point, seeing a coconut vendor by the side of the road near a waterfall. A person, a machete, and a pile of fresh coconuts: a complete roadside stand.
~~~

If there is an obvious association between the pie in my kitchen and a heap of coconuts in Puerto Rico, this one will be more obscure: a broken tooth and an orchid.

Sunday I broke a tooth. Apparently my life has reached a point where, in addition to lots of things aching, other things are going to simply fall off with no warning. Like half a tooth.

Don't worry - there will be no photograph of the broken tooth. Or of any teeth whatsoever. You're welcome.

But here is a preview of the orchid:


My truly lovely dentist made time for me to come to the office Monday morning, for some very welcome smoothing of sharp edges. (Welcome and successful: further treatment in the form of a crown can be postponed for a while, I am happy to say.)

So I left the office with good news, the ability to speak without wincing, and the bonus image of this orchid which was brightening the pristine treatment room: 


Is it not a beauty?
~~~~~

Saturday, July 6, 2013

a most refreshing salad


This is one of my all-time favorite summer treats.


I learned to make it about a hundred years ago, from my dear friend Peter's college roommate, Rick.

Thank you, Rick!

~~~
And Peter? Thank you for the perfect combination of softly scrambled eggs with baked beans and sweet relish on the side.  I suddenly remember a summer day as hot as this one, sitting on the kitchen counter in your folks' house, sipping a cold bottle of beer and watching you scramble the eggs.

All these years later, I often make scrambled eggs with baked beans and relish.  Never as good as yours, though!
~~~

I made a bowl of pea and peanut salad for the Independence Day barbecue, because I couldn't think of anything more refreshing for a hot, steamy, July afternoon.

This was the first time I've made it with homemade mayonnaise, and oh my.  It was an improvement on an old favorite.

Have you ever tried pea and peanut salad?  Do you love it?

It's an unlikely-sounding combination for sure, but it is delightfully sweet and light and flavorful.  And versatile!  I had it for breakfast this morning.

If you'd like to give it a go, here is a sort-of "recipe."  Rick didn't have an actual recipe that I recall, and I take the "why measure?" approach to making it, and have never had a disappointment. Experimentation and adventure calls you!


Pea and Peanut Salad

frozen peas
Spanish Redskin peanuts
sour cream
mayonnaise

Mix a generous dollop of mayonnaise with a smaller amount of sour cream.
Maybe two or three parts mayo to one part sour cream.

Mix some frozen peas with a smaller amount of peanuts.
Maybe four or six parts peas to one part peanuts.

Gently combine the two mixtures and chill.

That's it!

Using the peas while they are still frozen (but loose, not in a lump) means you can do the mixing without smooshing the peas at all.  They begin to thaw very quickly, though, and I like to eat at least a little bit of the salad immediately.
You know, just to decide whether it needs a little sprinkle of salt, or more peanuts or mayo or something.
Yes, that's why.
That, and because this salad is so tasty I can't put the bowl in the fridge without eating some first.

If you try it, please let me know how you like it!
~~~~~

Saturday, June 22, 2013

farro


Farro.  So easy.  I measure a cup or two into a pot and wash it in cool water, rubbing the grains together, and replacing the water a couple of times.  Then add about twice the volume of water per volume of grain.  Bring to a boil, reduce heat and simmer for 15 minutes or less, to retain a bit of chewiness.

Warm or cold, plain or sauced, added to vegetables, tuna, meat.

Yum.

This morning the chores were done and I was hard at work in the garden quite early, planting the marked-down organic vegetables I bought at the feed store yesterday.  They have been valiantly striving to grow in their little plastic pots, and I want to get them right into the ground as soon as possible.  Flourish, little plants!  I will try to help!

So by 9 AM, I had already been sweating and providing breakfast for countless mosquitoes for about three hours.  Time for my breakfast.  As I limped back to the house, I was thrilled to recall that I had cooked a pot of farro last night, and mixed one bowlful with a generous glug of sesame ginger salad dressing.

Yum!

So refreshing.  And so pleasant to relax on the screen porch for a while with Piper, enjoying the hummingbirds at the feeder, and planning the rest of the day.

Now it's 10:30, and on to the next task.  A little bit of fencework, and loading up for the Saturday dump run.  Whee!

Hope your Saturday is lovely  :)
~~~~~

Saturday, May 18, 2013

ya gotta break some eggs


Really must pull myself together here...I promise you babygoat naming and a kitchen tip, then - surprise!! - I give you astronauts and the International Space Station.

Catching up on earthly matters now!

First, please join me in the kitchen, for a recipe and a tip.

Have you ever heard the bizarrely obvious expression, "Ya gotta break some eggs if you want to make mayonnaise"?  Well, I have been making my own mayonnaise (after breaking the necessary eggs) for several months now.  Homemade mayonnaise is easy, quick, and delicious.  Bonus: the extremely simple recipe has room for flexibility and experimentation (= fun!).  As long as I have a blender and a few simple ingredients on hand, I may never go back to storebought.  If my blender breaks, I'll try using a whisk...that's how good this is.

Mayonnaise typically contains raw eggs, which I understand may not sit well with everyone.  I believe there are also "cooked" mayo recipes, so if you have experience with that method, please feel free to share in the comments.

Meanwhile, here's how I do it.

First, blend thoroughly:

2 eggs, largish
1 tsp mustard (dry)
1 tsp salt
4 Tablespoons vinegar (I've been using apple cider vinegar)

Then, with blender still running, slowly drizzle in:

1.5 c vegetable oil

The whole process takes maybe a couple of minutes.  I love it when the mayonnaise suddenly emulsifies like magic...my blender goes zzzzzzzzzz, zzz,zzz,zzz,z...z...z...and it's done.

I have been experimenting with mixtures of oils (such as half safflower, half sesame; half olive, half sesame, etc.) and also various types of salt.  So far, each batch has been different and each has been good!

When I used olive oil, the consistency remained a bit thinner (there was no z...z...z), but instead of tinkering with it, I decided it would be a fine component for a salad dressing if I didn't use it for sandwiches (which I did).  I wonder if olive oil made the difference?  It could also be the variable size of the eggs from my hens.  Will experiment further!
~~~
And here is the related "tip" - it's about breaking eggs, and it's something I heard in a recent podcast from David Leite, author of The New Portuguese Table.

I stumbled across David's blog several years ago, whilst spending hours googling in an attempt to figure out why my caldo verde (literally, "green soup") never seemed to taste quite the same as the caldo verde I ate nearly every day in Portugal.*

But no soupy sidetracking (or soupy twist!) here; back to eggs.  You probably already know that an easy way to remove eggshell fragments from a bowl of eggs is by using one of the shell halves as a scoop, right?  Just like an easy way to separate egg whites and yolks is by pouring the egg back and forth between halves of the eggshell, retaining the yolk as the white slips into a waiting bowl.  That thin, sharp edge of shell really does the trick.

But this new (to me, anyway) method of cracking eggs helps prevent eggshell fragments from the get-go.

Ready?  Here it is:

instead of cracking an egg against the edge of a bowl,
try cracking the side of the egg against a flat surface.

I know! 
Totally non-intuitive, right?
Sounds like a guaranteed way to make a horrible mess!

Well, I've been doing this for weeks now, and not only have I not made a mess, but I haven't had to scoop out a single shell fragment.

Hold the egg like this, and tap the side firmly against a flat surface.  I've tried using the kitchen counter, a flat plate, and the bottom of Piper's dish.
Guess which one was Piper's favorite.

The graphically-implausible result: instead of cracking roughly along a line (blue), the egg cracks in a sort of crater (yellow). I don't know why this works to prevent fragments. It may be physics. Or it may be magic. Like the mayonnaise.
If you decide to give this egg-cracking method a go, please let me know how it works for you.  I'm not sure if there if will be a difference in storebought and homegrown eggs, but maybe together we can gather some information.
~~~

Last but by no means least:
the two baby goats now have official names!

I like to choose names based on what is growing, budding, or blooming when the kids are born.  Violet's baby seemed to be born with her name, but it took a while to determine just the right name for Lily's baby.  Now they are both answering (well, sort of) to their names, so it's time to (re)introduce them to the blog.

With just a little bit of fanfare then...

tatata DA taDAHHHHH!!!

Sambucus


here with her mama, Violet

~
and Tsuga (with her mama, Lily of the Valley) 

Who is holding who in place? Hard to say. I think it's mutual.
~~~
Speaking of the kids, I know there has been a shortage of pictures lately.
I'm sorry.  It is not for lack of trying!

Remember when it was easy to get a fairly nice image?

Look!  It's a baby goat being still!!
It is much harder to get nice images of the kids at the moment, because now if I stand in the paddock they consider it an open invitation to climb up my legs, and if I am anywhere near their level, sitting on a rock for instance, they either climb up my back or leap without warning into my lap or even onto my shoulders.  Sambucus will sometimes sit quietly for a minute or so, but Tsuga is simply explosive.

A few days ago, in a last-ditch effort to get her in focus, I tried holding her on my lap with one hand while I held the camera in the other hand.  Rookie mistake!!  Tsuga sat still for a couple of shots, happily chewing on my scarf.  Two seconds after this picture was taken, she suddenly threw her head back and caught me right across the throat with her little rock-hard skull.  Before I could move, she flung her head the other way and got me full on the mouth.  Why?  She was trying to see what was behind her.  Because it might have been something interesting.  Tell you what...it's really, really hard to get a good picture of the kids at the moment!
~~~

*  I never asked David about the soup (I think I may have been a bit shy about commenting on blogs in those days) but after extensive experimentation I have since come to believe the reason my caldo verde doesn't taste the same as the caldo verde I ate in the Ribatejo is because I am eating it in Massachusetts.  Further research is clearly in order.
~~~

P.S.  Still a couple of days left to enter the May Giveaway! Good luck :)
~~~~~

Monday, March 11, 2013

simply delicious dip


Saturday I had an appointment in a city an hour away, which meant an opportunity to shop at grocery stores with lots of organic options, including fresh vegetables. For a special treat, I decided to buy the most delectable-looking organic greens I could find.

Fresh veggies don't keep well in my fridge; it's a tiny old fridge with two options:

1) keep all the fridge contents teetering on the edge of freezing

or

2) have meltwater from the little freezer compartment dripping down and pooling on everything below.  This option also makes opening the fridge door an adventure, let me tell you.  Nothing quite like opening the fridge first thing in the morning when you are not yet fully awake, and having a little wave of extremely cold water pour onto your feet.  Sometimes, my life is a bit like a cartoon.

3) Bonus option!  I just realized that a third choice would be to crank the dial all the way down and use the entire fridge as a freezer.  But then I would just fill it with frozen french fries and ice cream.  Or possibly just ice cream.

Hmmmm.

I generally choose the first option, which means most of my food is very, very cold, but not frozen solid.  The downside is, fresh vegetables don't have much of a chance.  They must either be eaten up in a day or two, or made into something else, such as soup or a casserole, that can take colder temperatures.

~~~

Here are the greens I selected on Saturday:


It seemed a little odd to be in a store boasting a massive display of loose produce and then to choose something prepackaged in a bag, but the three romaine hearts looked so perfect and clean and 100% edible, that they seemed like a fair deal.  I can't say "bargain" because the price was high, at least by my frugal standards: $4 for 12 oz of lettuce.

The above picture is what was left in the bag this morning. There were many outer leaves that have already been eaten.  They were delicious.


But the title of this post suggests a dip recipe, and here it comes.


Maybe everyone already knows about this, and if so, I hope I am not boring you. Perhaps the luscious lettuce leaves are worth the visit, at least for those of you who are, like me, still living in Winter? I hope so! 
I must also say, this is not much of a "recipe" but what else to call it?  "Trick" sounds sneaky or dishonest.  Suggestions for an alternative word welcome, as this will come up again.  My "cooking" and "recipes" are often of this level of complexity.
~~~

Here is my favorite way to make a dip or spread.  It is delicious.  I have taken a big bowl of this dip to parties, and people have begged for the recipe.  Seriously.  Begged.

It is versatile.  By modifying the ingredients slightly, or by serving it colder or warmer, it works as a thin dip or a thick dip, a chunky dip, or a sandwich spread.

It is simple to make.  There are TWO ingredients:

cream cheese

salsa

I've used many types of salsa, of varied heats and ingredients.
So far, every experiment has been a success.
Every time.
Success!
~~~

This dip is a great way to try out new salsa flavors and brands.  I've used everything from generic grocery-store brands to fancypants "gourmet" brands that were on sale, like this one:


If you start by experimenting with a few ounces of cream cheese and a good glug of salsa, you can taste as you go, knowing that more cream cheese makes it sweeter and cooler.

Or you can start with this simple combination:

8 ounces of cream cheese
6-8 ounces of salsa, depending on how thick and/or hot you want the dip to be.

Know also that the flavors will blend and change when the dip is in the fridge.  So exciting!

Of course the very best thing would probably be to use salsa one has put up from one's own garden vegetables.  I know lots of you do have lovely jars of homemade salsa glowing on your pantry shelves, and I admire you wholeheartedly.  If you try this dip, please tell me how awesome it tastes with homemade salsa!  Gardening inspiration needed, especially after the Flooding and Mudding Debacle of 2012!
~~~
To make your dip, all you have to do is warm the cream cheese a bit - I use 5-second shots in the microwave - then add the salsa and mix thoroughly.  You have a choice here: warm the cheese enough that it mixes completely, or a bit less, so there will be little chunks of cream cheese scattered throughout the dip.

You can also vary the taste and texture by adding more or less salsa.

These are the type of choices I can handle in life.
There is simply no way to lose.

Oh, and if you use a salsa that contains large chunks of tomato or such, you've got some excitement ahead!
Will the tortilla chips break under the load?
And will that stain ever come out of your favorite halter top?*
~~~
Yesterday I made a very thick batch, to spoon onto torn pieces of lettuce for a finger-food snack.  It was so good, I made it again for breakfast this morning.  

I wish you had been here to try it  :)


~~~
And here's an example what was left from the bag of lettuce:


Can't even call it "waste" because what you are looking at here is goat treats.  There will be Big Excitement in the paddock today, for about 30 seconds!
~~~

*No, that stain will never come out completely.  You will eventually admit defeat and cut up the halter top.  You will use the unstained piece of material to make a pincushion that will evoke memories of lovely summer days and remind you to buy cream cheese.
~~~~~